Migrating To Amazon S3
Print
Modified on: Sun, 9 Oct, 2016 at 5:07 PM
1. You will now see the list of our supported target systems.
First choose Business and then select Amazon S3 as
your target.

2.
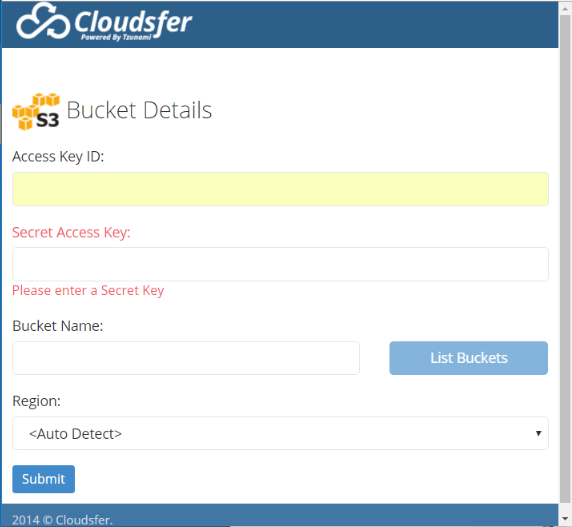
A pop-up window will appear. Enter your Amazon S3 account
details
3. Please note: you will be automatically directed to your Amazon S3 content structure.
4. This is your Amazon S3 content structure. Choose the path you
wish the content to be transferred to, and hit Submit.

5.
The Optional Settings menu will show. Here you can choose
and apply filters to your migration, such as: max file size to migrate, minimum
file size to migrate, migrate files which have been modified after a certain
date or migrate files which have been modified before a certain date.
After choosing your filter, click on Submit and Save
& Continue. If
you do not wish to apply any filter, simply click on Skip.

6. You’re
almost done! Give your migration plan a name. You can either schedule the
migration and run it at a later time, by clicking on Schedule migration for later, or click on Start migration now and
run the migration right away.

If you need any further assistance, please feel free
to contact us at support@cloudsfer.com
Did you find it helpful?
Yes
No
Send feedback Sorry we couldn't be helpful. Help us improve this article with your feedback.
